2023年1月23日

TrueNASにZabbixインストール


TrueNASのプラグインでZabbixをインストールをしようとしたけど、なんだかエラーが出てインストールできない…。

検索するとどうやら不具合らしくすぐに直る見込みもないとのこと。

仕方ないので以下のページを参考にしてZabbixを作ってみた。
https://www.truenas.com/community/threads/error-while-installing-zabbix-plugin.100202/#post-701917

環境は以下の通り。

  • TrueNAS v13.0-U3.1
導入したソフトウェアのバージョンは以下の通り。
  • Zabbix v6.2
  • MySQL 8.0
  • PHP 8.1
  • Nginx 1.22
手順は以下の通り。

Jailの設定

  1. TrueNASから「Jails」を選択し「ADD」をクリック。

  2. 「Name」に適当な名前を入力して「Jail Type」はそのままデフォルトで、「Release」はひとまず「13.1-RELEASE」にしておきます。で、「NEXT」をクリック。

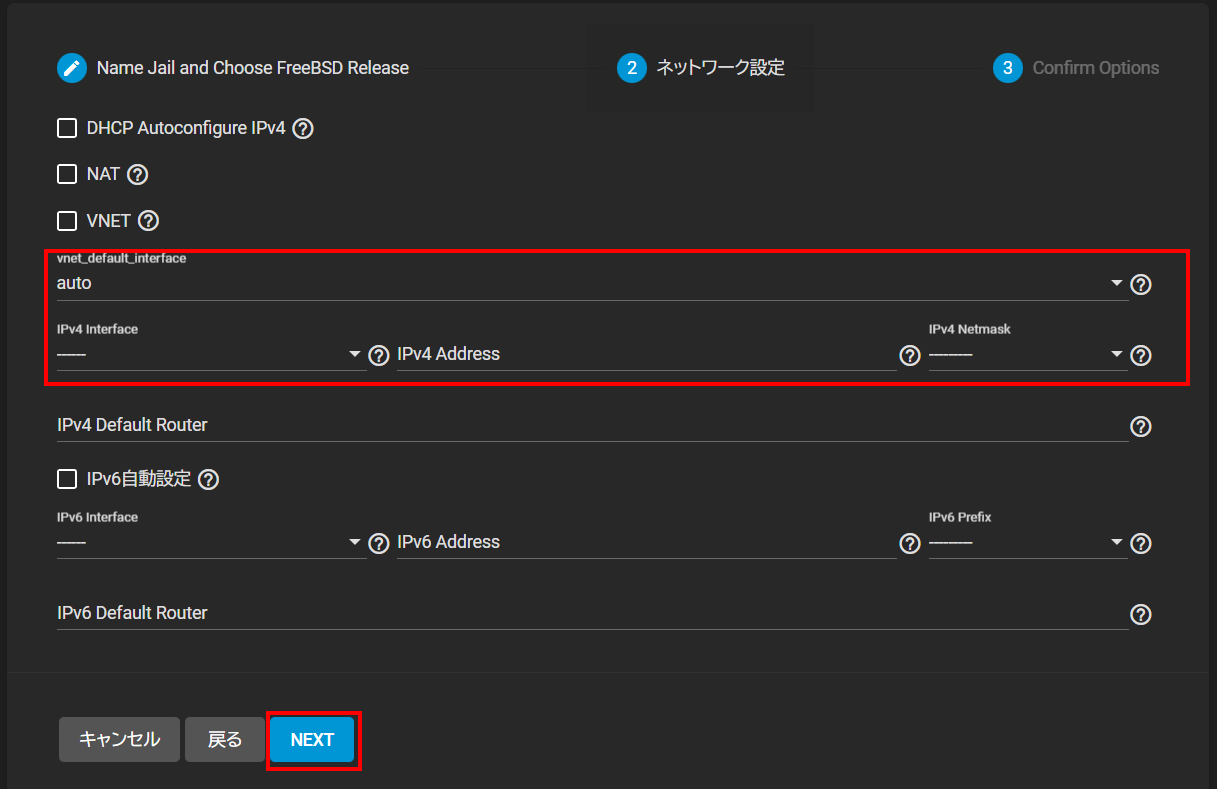
  3. IPアドレスなどを入力して「NEXT」をクリック。
    ※「VNET」にチェック入れないとエラーになったので、今回はチェックオンにして、「IPv4 Interface」を「vnet0」を選択。

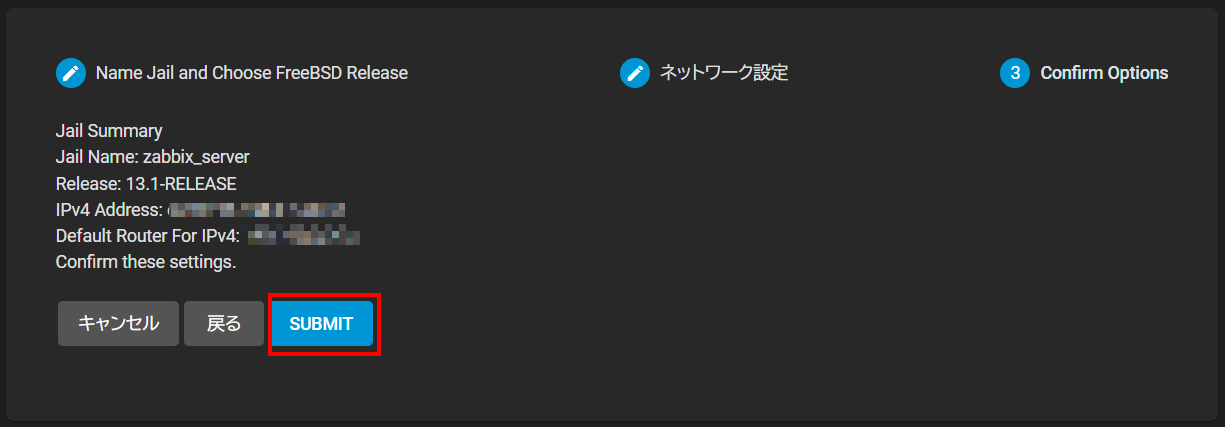
  4. 内容確認して「SUBMIT」をクリック。

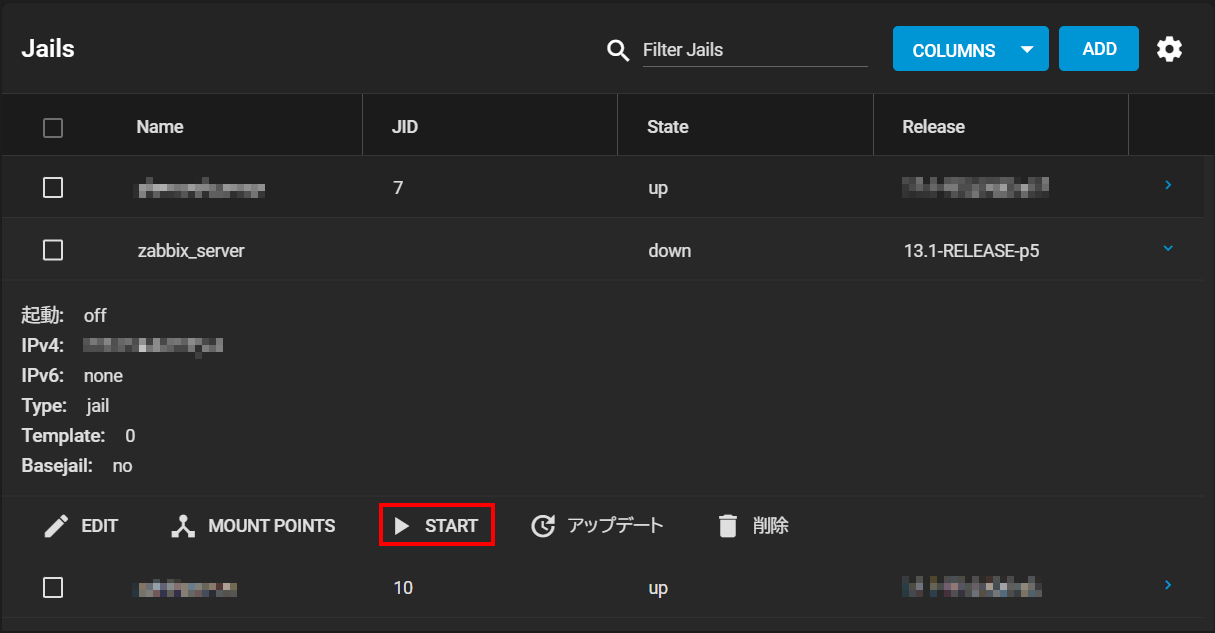
  5. 作ったJailを展開して「START」をクリック。

  6. 「State」が「up」になっていることを確認。

  7. 操作のために「シェル」をクリック。

  8. シェルの起動を確認。

準備作業

  1. パッケージのバージョンアップ
    # pkg update && pkg upgrade
    The package management tool is not yet installed on your system.
    Do you want to fetch and install it now? [y/N]: y
    :

  2. 各パッケージのインストール
    pkg install zabbix62-server-6.2.6 zabbix62-agent-6.2.6 zabbix62-frontend-php81-6.2.6

    Proceed with this action? [y/N]: y

    # pkg install mysql80-server-8.0.31
    :
    Proceed with this action? [y/N]: y

    # pkg install nginx-1.22.1_2,3
    :
    Proceed with this action? [y/N]: y


MySQLの設定

  1. MySQLの起動設定
    # sysrc mysql_enable=YES

  2. MySQLの起動
    # service mysql-server start

  3. MySQLの初期設定
    # mysql_secure_installation

    mysql_secure_installation: [ERROR] unknown variable 'prompt=\u@\h [\d]>\_'.

    Securing the MySQL server deployment.

    Connecting to MySQL using a blank password.

    VALIDATE PASSWORD COMPONENT can be used to test passwords
    and improve security. It checks the strength of password
    and allows the users to set only those passwords which are
    secure enough. Would you like to setup VALIDATE PASSWORD component?

    Press y|Y for Yes, any other key for No: y ※ VALIDATE PASSWORD プラグイン の利用確認

    There are three levels of password validation policy:

    LOW    Length >= 8
    MEDIUM Length >= 8, numeric, mixed case, and special characters
    STRONG Length >= 8, numeric, mixed case, special characters and dictionary file

    Please enter 0 = LOW, 1 = MEDIUM and 2 = STRONG: 2 ※パスワードのセキュリティレベル
    Please set the password for root here.

    New password: XXXXX ※rootのパスワード設定

    Re-enter new password: XXXXX ※同じパスワードを再度入力

    Estimated strength of the password: 50
    Do you wish to continue with the password provided?(Press y|Y for Yes, any other key for No) : y ※設定したパスワードの強度の確認。問題なければyを入力

    By default, a MySQL installation has an anonymous user,
    allowing anyone to log into MySQL without having to have
    a user account created for them. This is intended only for
    testing, and to make the installation go a bit smoother.
    You should remove them before moving into a production
    environment.

    Remove anonymous users? (Press y|Y for Yes, any other key for No) : y ※anonymousユーザーの削除
    Success.

    Normally, root should only be allowed to connect from
    'localhost'. This ensures that someone cannot guess at
    the root password from the network.

    Disallow root login remotely? (Press y|Y for Yes, any other key for No) : y ※rootのリモート接続を許可しない
    Success.

    By default, MySQL comes with a database named 'test' that
    anyone can access. This is also intended only for testing,
    and should be removed before moving into a production
    environment.

    Remove test database and access to it? (Press y|Y for Yes, any other key for No) : y ※testデータベースの削除
     - Dropping test database...
    Success.

     - Removing privileges on test database...
    Success.

    Reloading the privilege tables will ensure that all changes
    made so far will take effect immediately.

    Reload privilege tables now? (Press y|Y for Yes, any other key for No) : y ※リロードして変更を有効にする
    Success.

    All done!


  4. データベースとユーザーの作成
    mysql -uroot -p
    Enter password: XXXXX ※上記で設定したrootのパスワード

    SET GLOBAL log_bin_trust_function_creators = 1;
    CREATE DATABASE zabbix character set utf8mb4 collate utf8mb4_bin;
    CREATE USER 'zabbix'@'localhost' IDENTIFIED WITH mysql_native_password BY 'XXXXX'; ※zabbixユーザーのパスワード
    GRANT all privileges on zabbix.* to 'zabbix'@'localhost';
    FLUSH PRIVILEGES;
    quit;


  5. Zabbixデータベースのインストール
    # cd /usr/local/share/zabbix62/server/database/
    mysql -uzabbix -p zabbix < mysql/schema.sql
    Enter password: XXXXX ※zabbixユーザーのパスワード

    # mysql -uzabbix -p zabbix < mysql/images.sql
    Enter password: XXXXX ※zabbixユーザーのパスワード

    mysql -uzabbix -p zabbix < mysql/data.sql
    Enter password: XXXXX ※zabbixユーザーのパスワード


Nginx/PHPの設定

  1. Nginx/PHP FPMの起動設定
    # sysrc nginx_enable=YES
    # sysrc php_fpm_enable=YES


  2. PHPの設定
    # cd /usr/local/etc/
    # cp php.ini-production php.ini

    # vi php.ini


    編集箇所は以下の通り
    max_execution_time = 300
    max_input_time = 600
    post_max_size = 16M


  3. Nginxの設定
    # vi /usr/local/etc/nginx/nginx.conf

    server項目を以下のように設定
        server {
            listen       80;
            server_name  localhost;

            location / {
                root   /usr/local/www/zabbix62;
                index  index.php index.html;
            }
            # redirect server error pages to the static page /50x.html
            #
            error_page   500 502 503 504  /50x.html;
            location = /50x.html {
                root   /usr/local/www/nginx-dist;
            }
            # pass the PHP scripts to FastCGI server listening on 127.0.0.1:9000
            #
            location ~ \.php$ {
                root   /usr/local/www/zabbix62;
                fastcgi_pass   127.0.0.1:9000;
                fastcgi_index  index.php;
                fastcgi_param  SCRIPT_FILENAME  $document_root$fastcgi_script_name;
                include        fastcgi_params;
            }
        }


  4. Nginx/PHPの起動
    # service nginx start
    # service php-fpm start


Zabbixの設定

  1. Zabbixの起動設定
    # sysrc zabbix_server_enable=YES
    # sysrc zabbix_agentd_enable=YES

  2. DB設定の設定
    # vi /usr/local/etc/zabbix62/zabbix_server.conf

    編集箇所は以下の通り
    DBHost=localhost
    DBName=zabbix
    DBUser=zabbix
    DBPassword=XXXXX ※上記で設定したzabbixユーザーのパスワード


  3. Zabbixの起動
    # service zabbix_server start
    # service zabbix_agentd start


  4. ブラウザでZabbixサーバに接続
    http://NNN.NNN.NNN.NNN/ ※Jailで設定したIPアドレス


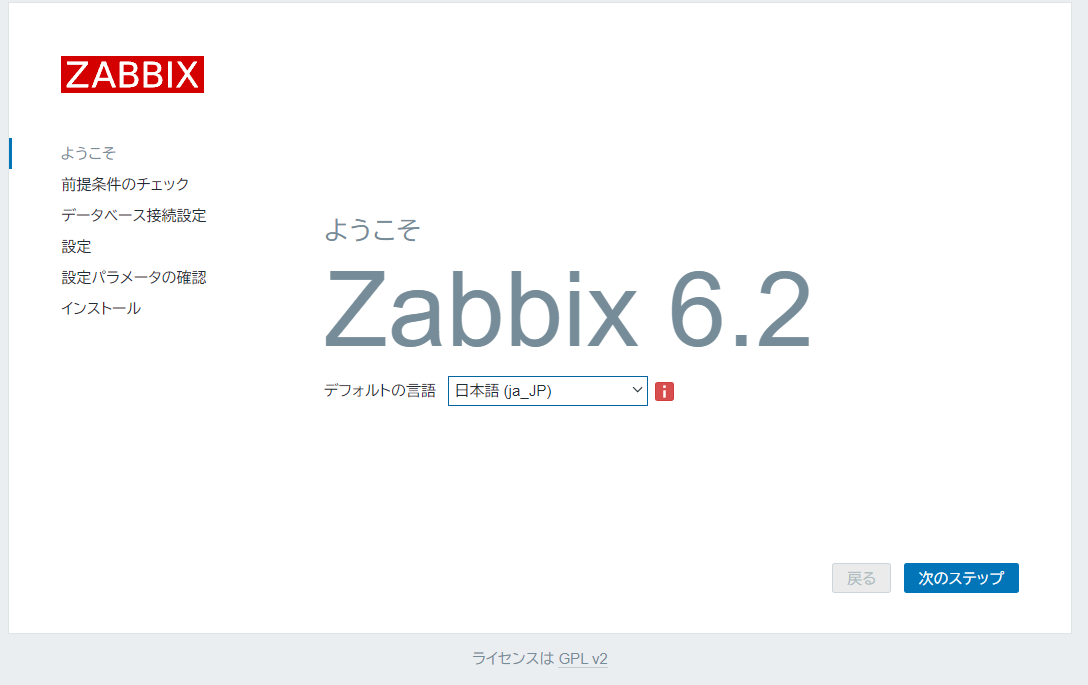
  5. 表示言語を日本語に切り替える

  6. 日本語への切り替えを確認し「次のステップ」をクリック

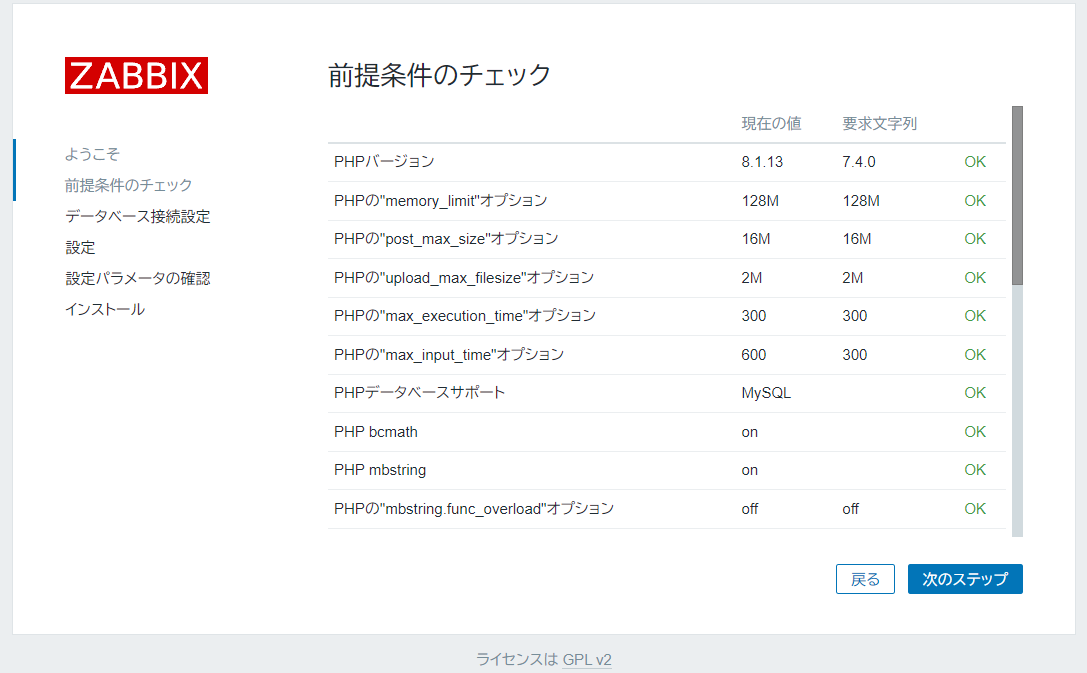
  7. 前提条件のチェックがすべて「OK」になっていることを確認し「次のステップ」をクリック(OKになっていない項目があれば対応する)

  8. パスワードにMySQLで設定したzabbixユーザーのパスワードを入力し「次のステップ」をクリック

  9. 「Zabbixサーバー名」は任意のサーバー名を入力し、「デフォルトのタイムゾーン」は「(UTC+09:00)Asia/Tokyo」を選択し、「次のステップ」をクリック

  10. 設定値を確認して「次のステップ」をクリック

  11. 設定ファイルの作成でエラーが出たので手動でインストールする
    「設定ファイルのダウンロード」部分をクリック

  12. 画面の指示に従いダウンロードしたファイルをメモ帳などで開いて内容を貼り付ける
    # vi /usr/local/www/zabbix62/conf/zabbix.conf.php

    ※新規ファイルの編集となるので、ダウンロードしたファイルの内容に貼り付けて保存する

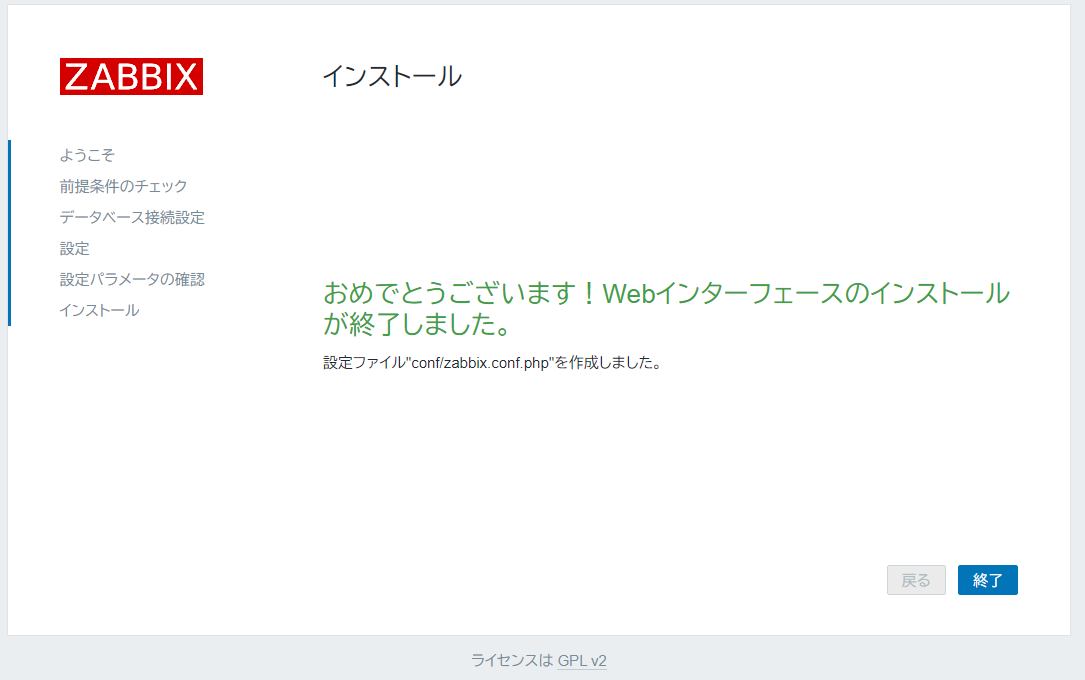
  13. 「終了」をクリック

  14. 再度「終了」をクリック

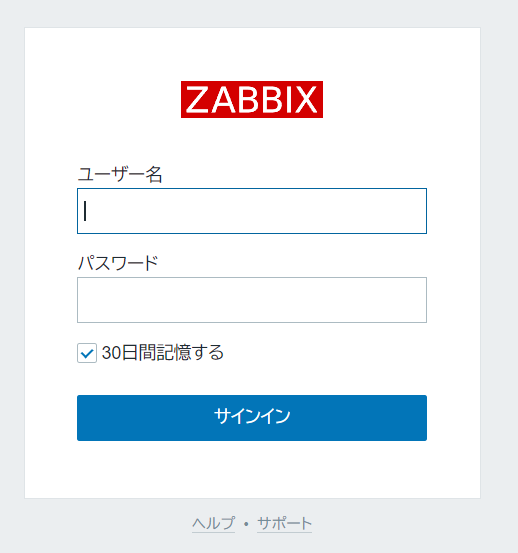
  15. 以下のユーザー名/パスワード(初期値)でログインする

    ユーザー名:Admin
    パスワード:zabbix


  16. ログインできることを確認する

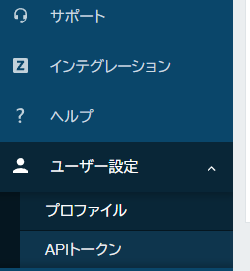
  17. まずはパスワードを変更する。画面左下の「ユーザー設定」→「プロファイル」をクリック

  18. 「パスワード変更」をクリック

  19. パスワードを2回入力して「更新」をクリック


2014年1月29日

VMware vSphereエラー:ESXi「192.168.XXX.XXX」で オブジェクト「ha-datastoresystem」の「HostDatastoreSystem.QueryVmfsDatastoreCreateOptions」 の呼び出しが失敗しました。

ESXi 5.5にて、新規でRAIDディスクを増設し、vSphere Clientから「ストレージの追加」を行ったところ、ディスクを選択した画面で下記エラーが発生。


ESXi「192.168.XXX.XXX」で オブジェクト「ha-datastoresystem」の「HostDatastoreSystem.QueryVmfsDatastoreCreateOptions」 の呼び出しが失敗しました。

何度やっても同じエラーが出るので、どうやらタイミングとかそういう問題ではない様子。

色々調べてみると、どうやらESXi側は正しくパーティション情報を取得できないが為に出るエラーのよう。パーティション情報を書いてやればいけそう??かな?

というわけで、やってみた。

SSHでESXiに接続して、パーティション情報確認

# fdisk -l

***
*** The fdisk command is deprecated: fdisk does not handle GPT partitions.  Please use partedUtil
***

Found valid GPT with protective MBR; using GPT

Disk /dev/disks/t10.ATA_____M42DCT064M4SSD2__________________________00000000112603137A47: 125045424 sectors,  119M
Logical sector size: 512
Disk identifier (GUID): dc0bc7f4-89d4-44b4-9bbb-1b28313dbcca
Partition table holds up to 128 entries
First usable sector is 34, last usable sector is 125045390

Number  Start (sector)    End (sector)  Size       Code  Name
   1              64            8191        8128   0700
   2         7086080        15472639       8190K   0700
   3        15472640       125045390        104M   0700
   5            8224          520191        499K   0700
   6          520224         1032191        499K   0700
   7         1032224         1257471        219K   0700
   8         1257504         1843199        571K   0700
   9         1843200         7086079       5120K   0700
fdisk: device has more than 2^32 sectors, can't use all of them

Disk /dev/disks/naa.600508b1001c72587786403dfb9a9c87: 2199.0 GB, 2199023255040 bytes
255 heads, 63 sectors/track, 267349 cylinders
Units = cylinders of 16065 * 512 = 8225280 bytes

Disk /dev/disks/naa.600508b1001c72587786403dfb9a9c87 doesn't contain a valid partition table

t10.ATA~の方は、ESXiをインストールしたドライブで、naa.600~の方が追加したドライブ。「valid partition table」なんて出ちゃってるから、確かにパーティション情報がちゃんとなってない模様。

というわけで、パーティション情報書き込みです。

# fdisk /dev/disks/naa.600508b1001c72587786403dfb9a9c87

***
*** The fdisk command is deprecated: fdisk does not handle GPT partitions.  Please use partedUtil
***

fdisk: device has more than 2^32 sectors, can't use all of them
Device contains neither a valid DOS partition table, nor Sun, SGI, OSF or GPT disklabel
Building a new DOS disklabel. Changes will remain in memory only,
until you decide to write them. After that the previous content
won't be recoverable.


The number of cylinders for this disk is set to 267349.
There is nothing wrong with that, but this is larger than 1024,
and could in certain setups cause problems with:
1) software that runs at boot time (e.g., old versions of LILO)
2) booting and partitioning software from other OSs
   (e.g., DOS FDISK, OS/2 FDISK)

Command (m for help): w
The partition table has been altered.
Calling ioctl() to re-read partition table

ただ、wしてみただけ。

で、再度「ストレージの追加」をすると、すんなり通過…。
こんなんでいいのか??
動いたから、とりあえずいいか。(^^)

2013年7月13日

ESXi 5.1のパッチアップデート(→Build:1117900)

ESXi 5.1に新しいパッチが出ていたので、パッチを当てる方法の紹介です。

まずは、VMwareのホームページからパッチをダウンロードします。
現在(2013.7.13現在)は、以下のところからダウンロードできます。
https://my.vmware.com/group/vmware/patch#search

「Search by Product」のところで、「ESXi (Embedded and Installable)」「5.1.0」を選択し、「Search」をクリックします。


検索結果から今回は「ESXi510-201305001」(リリース日:2013/5/22)をダウンロードします。

PC上の適当な場所に保存します。
次にダウンロードしたファイルをESXiにアップロードします。そのために、vSphere Clientを起動します。
「構成」タブを開き、「ストレージ」を選択すると、画面右にディスク一覧が表示されるので、アップロードしたいディスク(今回はESXiがインストールされているディスク)を選択し、右クリックで「データストアの参照」を選択します。

開いた画面の上部のアップロードアイコン(ディスクに上矢印)をクリックし「ファイルのアップロード」をクリックします。

先ほどダウンロードしたファイルを選択し「開く」をクリックします。

警告が出ますが「はい」をクリックします。

アップロードされますので、終わるまで待ちます。

アップロードが完了すると、データストア上にアップロードされたのが確認できます。


次にSSHでESXiに接続します。(TeraTermを使用しました)
※SSHの有効化はこちらを参照

パッチを適用する際には、事前に全ゲストOSを停止させておきます。
ゲストOSが起動していないかをここで念のため確認します。
~ # esxcli vm process list

ゲストOSが停止していることが確認できたら、メンテナンスモードにします。
~ # esxcli system maintenanceMode get
Disabled
~ # esxcli system maintenanceMode set --enable=true
~ # esxcli system maintenanceMode get
Enabled

アップロードしたファイルを使ってパッチを適用します。
~ # esxcli software vib update -d /vmfs/volumes/datastore1/ESXi510-201305001.zip

Installation Result
   Message: The update completed successfully, but the system needs to be rebooted for the changes to be effective.
   Reboot Required: true
   VIBs Installed: VMware_bootbank_esx-base_5.1.0-1.13.1117900, VMware_bootbank_esx-xserver_5.1.0-0.11.1063671, VMware_bootbank_ipmi-ipmi-si-drv_39.1-4vmw.510.1.12.1065491, VMware_bootbank_misc-drivers_5.1.0-1.12.1065491, VMware_bootbank_net-bnx2_2.0.15g.v50.11-7vmw.510.1.12.1065491, VMware_bootbank_net-bnx2x_1.61.15.v50.3-1vmw.510.0.11.1063671, VMware_bootbank_net-e1000e_1.1.2-3vmw.510.1.12.1065491, VMware_bootbank_net-igb_2.1.11.1-3vmw.510.1.12.1065491, VMware_bootbank_net-ixgbe_3.7.13.6iov-10vmw.510.1.12.1065491, VMware_bootbank_net-tg3_3.123b.v50.1-1vmw.510.1.12.1065491, VMware_bootbank_scsi-megaraid-sas_5.34-4vmw.510.1.12.1065491, VMware_locker_tools-light_5.1.0-1.12.1065491
   VIBs Removed: VMware_bootbank_esx-base_5.1.0-0.10.1021289, VMware_bootbank_esx-xserver_5.1.0-0.0.799733, VMware_bootbank_ipmi-ipmi-si-drv_39.1-4vmw.510.0.0.799733, VMware_bootbank_misc-drivers_5.1.0-0.0.799733, VMware_bootbank_net-bnx2_2.0.15g.v50.11-7vmw.510.0.0.799733, VMware_bootbank_net-bnx2x_1.61.15.v50.3-1vmw.510.0.0.799733, VMware_bootbank_net-e1000e_1.1.2-3vmw.510.0.0.799733, VMware_bootbank_net-igb_2.1.11.1-3vmw.510.0.0.799733, VMware_bootbank_net-ixgbe_3.7.13.6iov-10vmw.510.0.0.799733, VMware_bootbank_net-tg3_3.110h.v50.4-4vmw.510.0.0.799733, VMware_bootbank_scsi-megaraid-sas_5.34-4vmw.510.0.0.799733, VMware_locker_tools-light_5.1.0-0.9.914609
   VIBs Skipped: VMware_bootbank_ata-pata-amd_0.3.10-3vmw.510.0.0.799733, VMware_bootbank_ata-pata-atiixp_0.4.6-4vmw.510.0.0.799733, VMware_bootbank_ata-pata-cmd64x_0.2.5-3vmw.510.0.0.799733, VMware_bootbank_ata-pata-hpt3x2n_0.3.4-3vmw.510.0.0.799733, VMware_bootbank_ata-pata-pdc2027x_1.0-3vmw.510.0.0.799733, VMware_bootbank_ata-pata-serverworks_0.4.3-3vmw.510.0.0.799733, VMware_bootbank_ata-pata-sil680_0.4.8-3vmw.510.0.0.799733, VMware_bootbank_ata-pata-via_0.3.3-2vmw.510.0.0.799733, VMware_bootbank_block-cciss_3.6.14-10vmw.510.0.0.799733, VMware_bootbank_ehci-ehci-hcd_1.0-3vmw.510.0.0.799733, VMware_bootbank_esx-dvfilter-generic-fastpath_5.1.0-0.0.799733, VMware_bootbank_esx-tboot_5.1.0-0.0.799733, VMware_bootbank_esx-xlibs_5.1.0-0.0.799733, VMware_bootbank_ima-qla4xxx_2.01.31-1vmw.510.0.0.799733, VMware_bootbank_ipmi-ipmi-devintf_39.1-4vmw.510.0.0.799733, VMware_bootbank_ipmi-ipmi-msghandler_39.1-4vmw.510.0.0.799733, VMware_bootbank_misc-cnic-register_1.1-1vmw.510.0.0.799733, VMware_bootbank_net-be2net_4.1.255.11-1vmw.510.0.0.799733, VMware_bootbank_net-cnic_1.10.2j.v50.7-3vmw.510.0.0.799733, VMware_bootbank_net-e1000_8.0.3.1-2vmw.510.0.0.799733, VMware_bootbank_net-enic_1.4.2.15a-1vmw.510.0.0.799733, VMware_bootbank_net-forcedeth_0.61-2vmw.510.0.0.799733, VMware_bootbank_net-nx-nic_4.0.558-3vmw.510.0.0.799733, VMware_bootbank_net-r8168_8.013.00-3vmw.510.0.0.799733, VMware_bootbank_net-r8169_6.011.00-2vmw.510.0.0.799733, VMware_bootbank_net-s2io_2.1.4.13427-3vmw.510.0.0.799733, VMware_bootbank_net-sky2_1.20-2vmw.510.0.0.799733, VMware_bootbank_net-vmxnet3_1.1.3.0-3vmw.510.0.0.799733, VMware_bootbank_ohci-usb-ohci_1.0-3vmw.510.0.0.799733, VMware_bootbank_sata-ahci_3.0-13vmw.510.0.0.799733, VMware_bootbank_sata-ata-piix_2.12-6vmw.510.0.0.799733, VMware_bootbank_sata-sata-nv_3.5-4vmw.510.0.0.799733, VMware_bootbank_sata-sata-promise_2.12-3vmw.510.0.0.799733, VMware_bootbank_sata-sata-sil24_1.1-1vmw.510.0.0.799733, VMware_bootbank_sata-sata-sil_2.3-4vmw.510.0.0.799733, VMware_bootbank_sata-sata-svw_2.3-3vmw.510.0.0.799733, VMware_bootbank_scsi-aacraid_1.1.5.1-9vmw.510.0.0.799733, VMware_bootbank_scsi-adp94xx_1.0.8.12-6vmw.510.0.0.799733, VMware_bootbank_scsi-aic79xx_3.1-5vmw.510.0.0.799733, VMware_bootbank_scsi-bnx2i_1.9.1d.v50.1-5vmw.510.0.0.799733, VMware_bootbank_scsi-fnic_1.5.0.3-1vmw.510.0.0.799733, VMware_bootbank_scsi-hpsa_5.0.0-21vmw.510.0.0.799733, VMware_bootbank_scsi-ips_7.12.05-4vmw.510.0.0.799733, VMware_bootbank_scsi-lpfc820_8.2.3.1-127vmw.510.0.0.799733, VMware_bootbank_scsi-megaraid-mbox_2.20.5.1-6vmw.510.0.0.799733, VMware_bootbank_scsi-megaraid2_2.00.4-9vmw.510.0.0.799733, VMware_bootbank_scsi-mpt2sas_10.00.00.00-5vmw.510.0.0.799733, VMware_bootbank_scsi-mptsas_4.23.01.00-6vmw.510.0.0.799733, VMware_bootbank_scsi-mptspi_4.23.01.00-6vmw.510.0.0.799733, VMware_bootbank_scsi-qla2xxx_902.k1.1-9vmw.510.0.0.799733, VMware_bootbank_scsi-qla4xxx_5.01.03.2-4vmw.510.0.0.799733, VMware_bootbank_scsi-rste_2.0.2.0088-1vmw.510.0.0.799733, VMware_bootbank_uhci-usb-uhci_1.0-3vmw.510.0.0.799733

これでパッチ適用は完了なので、ESXiを再起動します。
~ # esxcli system shutdown reboot -r "PATCH:ESXi510-201305001.zip"

再起動完了後に、メンテナンスモードを解除して完了です。
~ # esxcli system maintenanceMode get
Enabled
~ # esxcli system maintenanceMode set --enable=false
~ # esxcli system maintenanceMode get
Disabled

最後に念のため、vSphere Clientにログインしてビルド番号を確認しましょう。


ESXi 5.1でSSHの有効化

いきなりESXi 5.1です。
もうインストール後です(^^;

というわけで、遠隔で色々さわりたいので、SSHを有効化する方法です。

まずはvSphere Clientにログインして「構成」の画面を開きます。
そこから「セキュリティ プロファイル」を選択し、画面右の「サービス」の「プロパティ...」をクリックします。


開いた画面から「SSH」を探し、「オプション...」をクリックします。

「サービスコマンド」の「開始」をクリックし、まずはSSHサービスを開始します。

次回起動時にでもホストの起動と同時にSSHサービスが有効になるように「起動ポリシー」内の「ホストに連動して開始および停止」を選択し、「OK」をクリックします。

SSHサービスが起動中になっていることを確認します。

これで外部からSSHで接続できるようになります。TeraTermなどでつないでみてください。
TeraTermでの繋ぎ方はこんな感じです。

まずはTeraTermを起動します。
「ホスト」にIPアドレス、もしくは登録したホスト名を入力します。サービスは「SSH」を選択し「OK」をクリックします。

認証画面では、ユーザ名に「root」を入力し、「チャレンジレスポンス認証を使う(キーボードインタラクティブ)」を選択し、「OK」をクリックします。

パスワード入力画面が表示されるので、パスワードを入力して「OK」をクリックします。

認証が通るとコンソール画面が開きます。

あとはUNIXライクなコマンドで色々いじれます。

2012年8月25日

ESXi 4.1でWindows 8

ESXi 4.1にWindows 8をインストールしてようとしたが、以下のエラーが出て進まなかった。
調べてみると、Windows 8はESXi 4.1ではサポート外となるようだ…。
残念…。
5.0以上に上げるしかないのか。


5.0にはパッチが出ているようだ。
http://kb.vmware.com/selfservice/microsites/search.do?language=en_US&cmd=displayKC&externalId=2006859

2012年4月13日

SharePoint Server 2010 をインストール

社内ファイル共有用に、SharePoint Serverを立ち上げ、Office Web Appsでブラウザから編集できる環境を作ってみようと、家の仮想環境にSharePoint Serverをインストールしてみました。

家のVM環境上で以下のGuestOSを立ち上げました。
  • OS:Windows Server 2008 R2 SP1(Windows Updateにて4/12現在までアップデート)
  • 役割や機能は何もなし
  • リモートデスクトップだけON

 Technetから「SharePoint Server 2010 with Service Pack 1 (x64) - (Japanese)」をダウンロードし、実行します。

SharePoint Serverのインストールメニューが出ますので、「ソフトウェア必須コンポーネントのインストール」をクリックします。


必要なコンポーネント一覧が表示されますので、「次へ」をクリックします。

ライセンスに同意し「次へ」をクリックします。

インストールが始まるのでしばらく待ちます。

インストールが終わったと思ったらエラーが出たようです。とりあえず「完了」をクリックします。

原因を深く調べずに、エイヤっともう一回コンポーネントのインストールをしてみます。

(中略)
なんかわかりませんが、今度は正常にインストールできたようです。エラーの原因を深く調べるのは今度にしましょう(^^;
「完了」をクリックしてコンポーネントのインストールを終わります。

次に本命SharePointのインストールをします。
インストールメニューの「SharePoint Serverのインストール」をクリックします。

プロダクトキーの入力を求められます。今回は「SharePoint Server 2010 Enterprise」のライセンスを使用しました。Standardとの違いがまだよくわかってませんが、きっと大は小を兼ねる的な感じのはずです。


ライセンス条項に同意し「続行」をクリックします。


インストールの種類は「スタンドアロン」にしました。なんでスタンドアロンかは、正直まだよくわかってません。他のblogにそう書いてあったので…(^^; ここもまた今度調べましょう。


インストールが始まります。さすがにちょっと時間がかかりました。


インストールが終わると「閉じる」をクリックします。


構成ウィザードが始まるので、まずは「次へ」をクリックします。


警告が表示されたので、素直に「はい」をクリックしました。

何かが動き出しました。これもちょっと時間かかりました。


と思ったら終わってしまいました。「完了」をクリックします。何が動いてたのでしょうか…。

その後、IEが起動し、認証画面が表示されました。特にユーザーも作っていなかったので、Administratorでログインしてみました。

ログイン完了すると、なにやら表示されました。正常にインストールが完了したという証拠でしょうか?


というわけで、今回は文書の共有が目的なので、右のテンプレート一覧のところから「ドキュメントワークスペース」ってのを選んでみました。これで合っているかはわかりませんが、これっぽいという理由で選びました。間違っててもきっと後でなんとかなるでしょう(^^)

なんか頑張って処理してるみたいです。これもちょっと時間かかりました。


アクセス権的な設定でしょうか。よくわからないので、デフォルトです。きっとおいおい意味がわかってくるでしょう(^^;


おぉ、なんかホーム画面が表示されました。ワクワクしながら「ドキュメントの追加」をクリックしてみました。


ドキュメントの選択画面が表示されたので、適当にテストで作ったExcelファイルをアップしてみました。


ちゃんとアップロードされたようです。


試しに開いてみると、ブラウザ内でちゃんとExcelファイルが表示されました。でもこのままでは編集は出来ないようです。これで完成かと思いましたが、やはりOffice Web Appsが必要なのかな?

とりあえず、今日はここまで。
続きは次回!